InviteBatch team
In this guide
- 1Pocketfold sizes at a glance
- 2What size should the main invitation be so the pocketfold still folds?
- 3What size should staggered inserts be?
- 4Which order do the inserts go in?
- 5How do I set up staggered inserts in Canva if my printer only prints standard sizes?
- 6What about A6 pocketfolds?
- 7How much does it cost to print a pocketfold suite?
- 8Will a pocketfold invitation cost more to post?
- 9Do I need a paper RSVP card at all?
- 10Checklist before you order
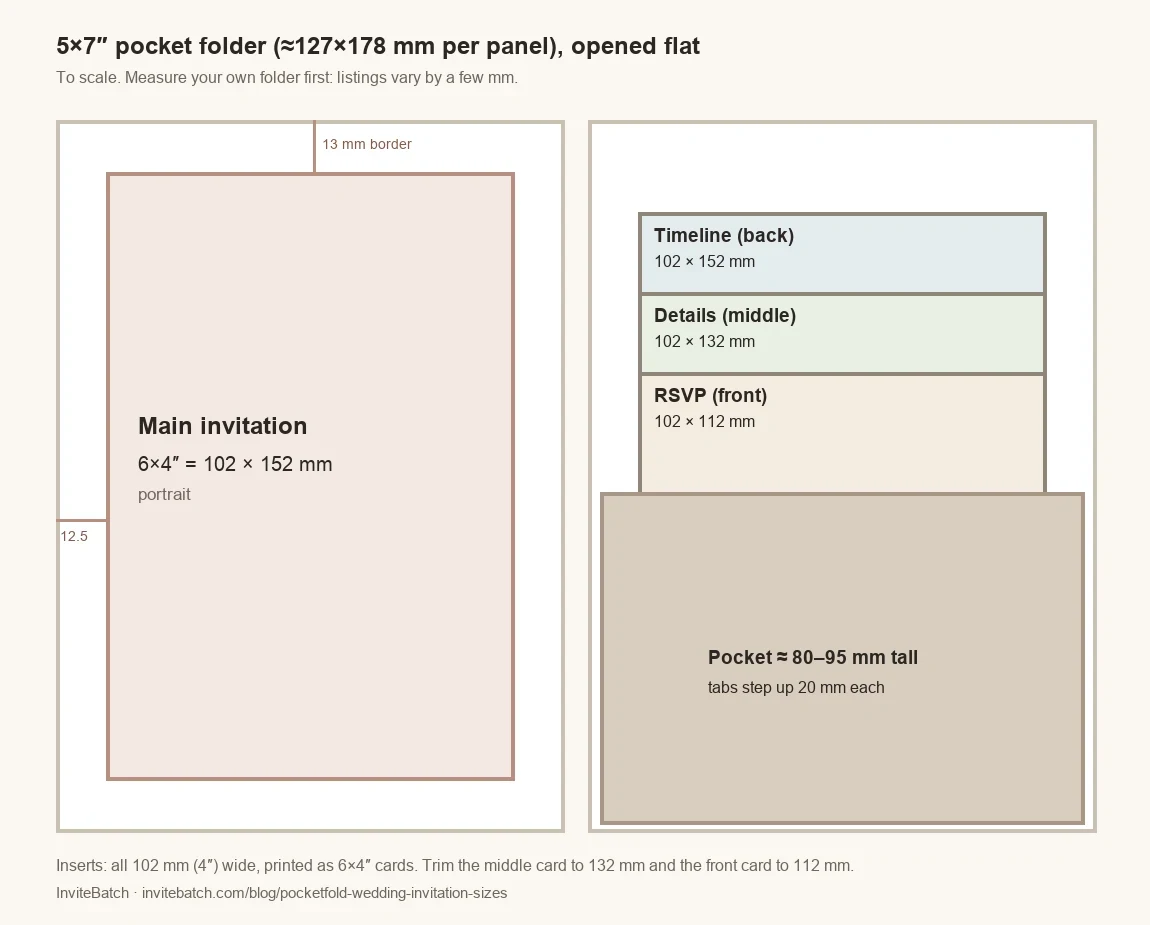
The short answer: for a 5×7″ pocket folder (the laser-cut tri-fold kind sold on Shein, Amazon and Etsy, about 127×178 mm per panel), print the main invitation at 6×4″ (102×152 mm) to leave a 12–13 mm border all round so the folder still closes. Make the three inserts the same width, 102 mm (4″), and stagger their heights: timeline 152 mm, details 132 mm, RSVP 112 mm (6″, 5.2″, 4.4″). Tallest at the back, shortest at the front, headings in the top 15 mm. Measure your own folder first, because listings vary by a few millimetres.
Not sure your folder matches? Download the free measuring guide (PDF): a worksheet plus true-size cut-out templates you can test in your folder before printing anything. If your files are ready, you can print one test card of each piece first. One 6×4″ card is £8.94 delivered in the UK.
Pocketfold sizes at a glance
| Piece | Size (mm) | Size (inches) | Where it goes | Standard card or custom cut? |
|---|---|---|---|---|
| Folder, each panel | about 127 × 178 | 5 × 7 | Measure yours | – |
| Main invitation, wide border | 102 × 152 | 4 × 6 | Centre panel, 12–13 mm border | Standard 6×4″ card |
| Main invitation, slim border | about 120 × 171 | 4.75 × 6.75 | Centre panel, 3–4 mm border | Custom cut (not a standard size) |
| Insert 1: timeline (tallest) | 102 × 152 | 4 × 6 | Back of the pocket | Standard 6×4″ card |
| Insert 2: details | 102 × 132 | 4 × 5.2 | Middle | 6×4″ card, you trim 20 mm off the bottom |
| Insert 3: RSVP (shortest) | 102 × 112 | 4 × 4.4 | Front of the pocket | 6×4″ card, you trim 40 mm off the bottom |
| Pocket height | about 80–95 | about 3.1–3.7 | Varies by maker | – |
What “standard” means here: InviteBatch prints three fixed card sizes, 6×4″ (102×152 mm), 7×5″ (127×178 mm) and 5.8″ square (147×147 mm). We don’t cut custom sizes. That’s why these sizes are built around the 6×4″ card: the main invitation and the timeline print as they are, and the two shorter inserts are 6×4″ cards you trim at home. Stationers who cut insert sets to order often use 105 mm wide cards stepping down by 20 mm (for example 165, 145 and 125 mm), which works the same way.
What size should the main invitation be so the pocketfold still folds?
Smaller than the panel it sits on, so it never crosses a fold line. On a 127×178 mm panel:
- 6×4″ card (102×152 mm): a clear border of about 12.5 mm at the sides and 13 mm at the top and bottom. This is the “gap around the edges” look, and it folds easily.
- About 120×171 mm (4.75×6.75″): a slim 3–4 mm border. It looks fuller, but it needs a printer that cuts custom sizes, and there is less room for error when you glue it on.
- Full 7×5″ card (127×178 mm): fills the panel edge to edge. There is no border, and a card that touches the fold can stop the folder closing flat. Only use 7×5″ if your folder is at least 133×184 mm.
Fix the main invitation with double-sided tape or glue dots at the corners, not all over, so the folder bends at its scored line and not through your card.
What size should staggered inserts be?
All the same width, different heights. That is what makes the neat “waterfall” of headings above the pocket. Three rules:
- Width: 10–25 mm narrower than the pocket, so the cards slide in without bending. For a 5×7″ folder that is 100–105 mm; 102 mm (4″) fits the most folders.
- Tallest card: at least 20 mm shorter than the folder, so it doesn’t poke out when the folder is closed. On a 178 mm folder, 152 mm is safe.
- Steps: 15–20 mm between heights, and the shortest card at least 15 mm taller than the pocket, so its heading shows. With a 85 mm pocket, a 112 mm card shows 27 mm.
| Pocket height | Tallest | Middle | Shortest | Step |
|---|---|---|---|---|
| 80 mm | 152 mm | 130 mm | 108 mm | 22 mm |
| 85–90 mm | 152 mm | 132 mm | 112 mm | 20 mm |
| 95 mm | 152 mm | 135 mm | 118 mm | 17 mm |
Which order do the inserts go in?
Tallest at the back, shortest at the front:
- Back: timeline or order of the day. Ceremony, drinks, wedding breakfast, speeches, first dance, carriages.
- Middle: details. Venue address and parking, dress code, children, gifts, accommodation and taxis.
- Front: RSVP. It is the card guests take out and use, so it should be easiest to reach.
Put each card’s heading in its top 15 mm (“The Day”, “Details”, “RSVP”), because that strip is all a guest sees before pulling the card out. Keep everything else lower down.
How do I set up staggered inserts in Canva if my printer only prints standard sizes?
Print all three inserts as 6×4″ portrait cards and trim two of them shorter. The widths stay exactly the same, which is the hard part to get right by hand.
- In Canva, make a 4×6 in portrait design (102×152 mm) for each insert.
- Turn on rulers and guides and drag a horizontal guide to 132 mm from the top on the details card and 112 mm on the RSVP card. Keep all wording above the guide, and keep the background plain below it.
- Leave about 5 mm (¼″) between your text and every edge, because cards are trimmed.
- Download each as PDF Print (Share → Download → PDF Print). More on exporting and printing Canva files on our Canva invitation printing page.
- When the cards arrive, mark 132 mm and 112 mm from the top on the back in pencil and cut with a paper trimmer (or a metal ruler and craft knife). A trimmer that holds the card square gives cleaner results than scissors.
If you would rather not trim, use a stationer who cuts pocketfold insert sets to set heights, such as Vintage Prints’ “Print my Design” insert cards, which come in three sizes for their 5×7″ and A5 pocketfolds.
What about A6 pocketfolds?
An A6 pocketfold holds A6 cards (105×148 mm) and folds to about 114×157 mm. A 6×4″ card (102×152 mm) fits on its panel but almost fills it, so there is no visible border. For an A6 folder, use a main invitation of about 95×140 mm and inserts about 90–95 mm wide, cut by a printer that offers custom sizes.
How much does it cost to print a pocketfold suite?
Each piece is its own design, so it is its own order of identical cards. For 60 invitations printed at InviteBatch on 6×4″ cards, delivered in the UK with VAT:
| Piece | 60 × 6×4″ cards (280gsm gloss), delivered |
|---|---|
| Main invitation | £61.80 |
| Timeline insert | £61.80 |
| Details insert | £61.80 |
| RSVP insert | £61.80 |
| All four pieces | £247.20 |
Our 6×4″ cards print on 280gsm gloss card; the studio doesn’t ask for a card type at this size. Plus the folders and envelopes you bought. Inserts don’t need their own envelopes, because the folder holds them.
To be straight with you: for 240 identical-size cards, a trade printer with a 25- or 50-card minimum can be cheaper per card. Where we help is the test set, printing from a phone or Canva file without fixing it, and topping up a few cards later.
To check everything before you print 240 cards, test one complete set first: save the invitation and the three inserts as one 4-page PDF, upload it on the test print page, choose 6×4″ and answer “Yes, one card per page”. We print one of each in a single order with one delivery, each priced as a single card: £15.61 for the set of four, delivered in the UK. Put them in your folder and check the border, the fold, the stagger and the envelope before ordering the rest.
Will a pocketfold invitation cost more to post?
Often, yes. Royal Mail’s Letter size is up to 240×165 mm, 5 mm thick and 100 g. A 5×7″ folder in a 133×184 mm envelope fits the length and width, but a folder plus four cards is often more than 5 mm thick, which makes it a Large Letter with a higher stamp price. Assemble one complete invitation in its envelope, check its thickness and weigh it before you buy stamps. A post office counter has a thickness gauge.
Do I need a paper RSVP card at all?
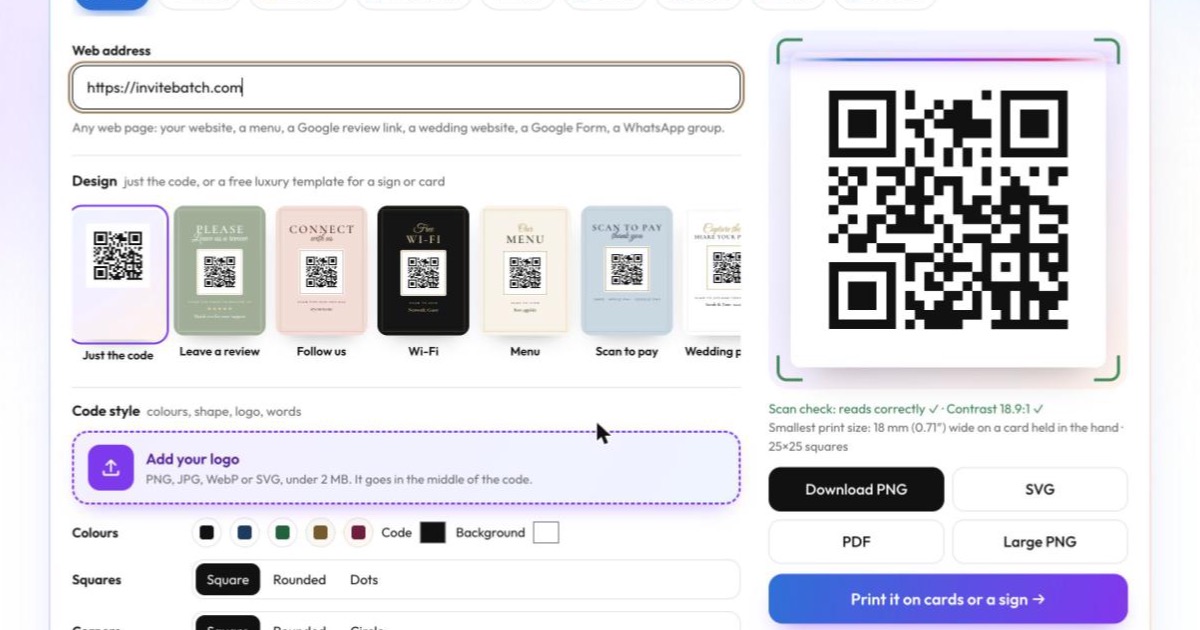
Not necessarily. Many couples now keep an RSVP card in the pocket but put a QR code on it, so guests reply online instead of posting it back. You can make a free RSVP page with a QR code and add the code to your RSVP insert, or add it while you order on our QR code wedding invitations page. Keep the QR code at least 20 mm wide and on a plain, light background so phones read it.
Checklist before you order
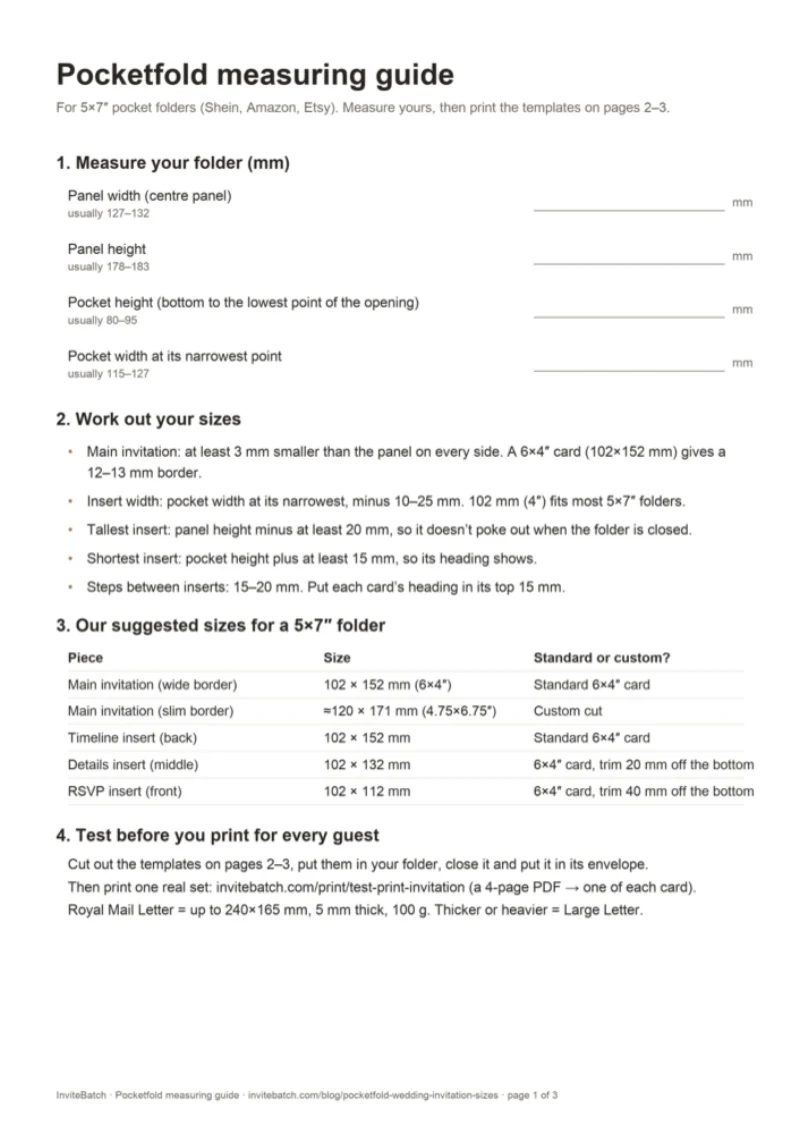
- Measure your folder: panel width and height, pocket height, and the pocket’s narrowest width (use the measuring guide PDF).
- Main invitation at least 3 mm away from every fold; 6×4″ for a wide border.
- Inserts all the same width, 10–25 mm narrower than the pocket.
- Heights stepped 15–20 mm, shortest at least 15 mm above the pocket.
- Headings in the top 15 mm of each insert.
- Text at least 5 mm from every edge.
- Print one full set, assemble it, close it, put it in its envelope, then weigh it.
Ready to print? Upload your design at wedding invitation printing, from 1 card. More on sizes in printable 5×7 wedding invitations and how to print from Canva.